


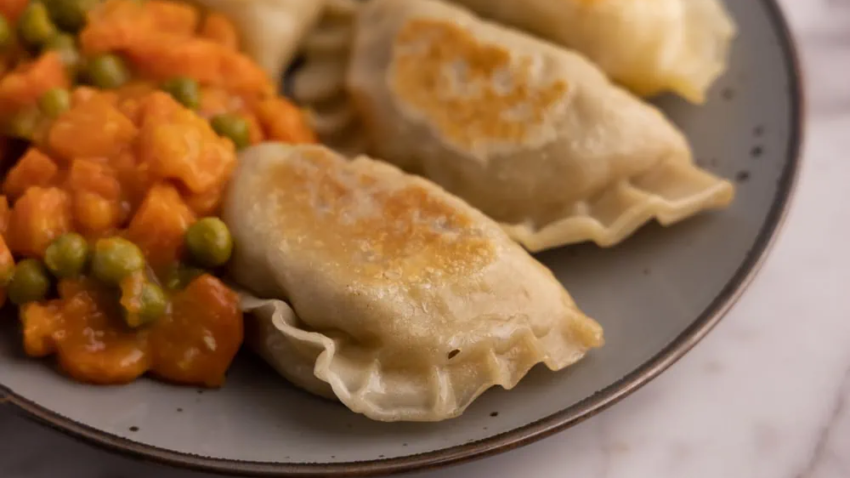
Pierogies: Classic Pork
| Prep time: | 1 hour 30 minutes |
| Cook time: | 30 minutes |
| Total time: | 2 hours |
| Servings: | makes 30-40 pierogi |
| Cuisine: | Polish, European |
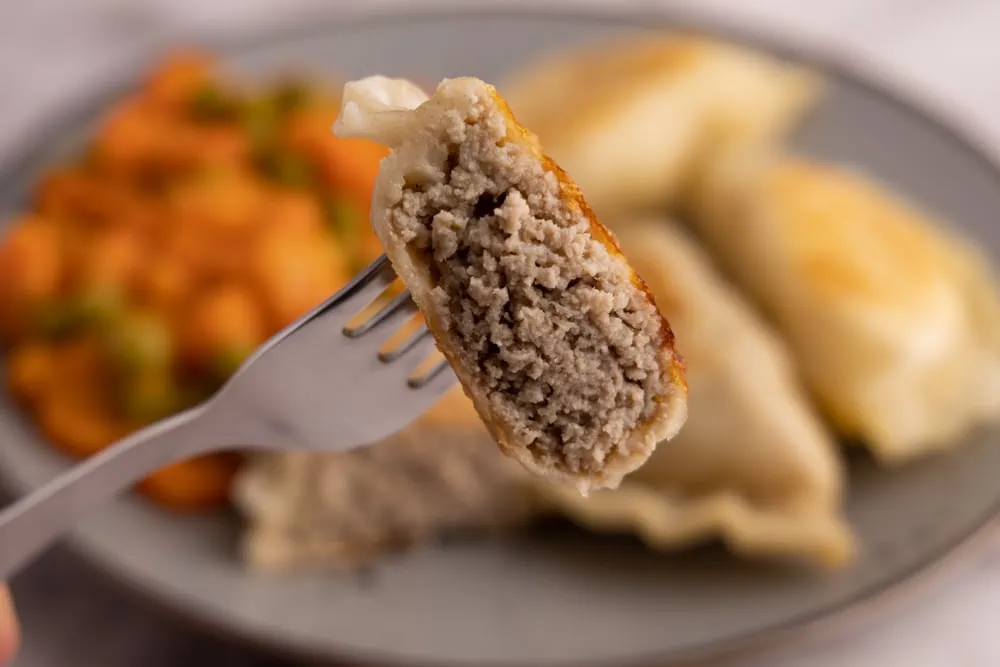
When it comes to comfort food, few dishes can match the savory delight of meat pierogi. These plump pockets of dough filled with spiced ground meat are a staple of Polish cuisine, but have also gained a devoted following around the world.
Ingredients:
1 batch pierogi dough
1 pound ground pork, or any other ground meat ~450g
1 yellow onion, large
4 T cooking oil
1 egg, lightly beaten
salt and pepper to taste
Instructions:
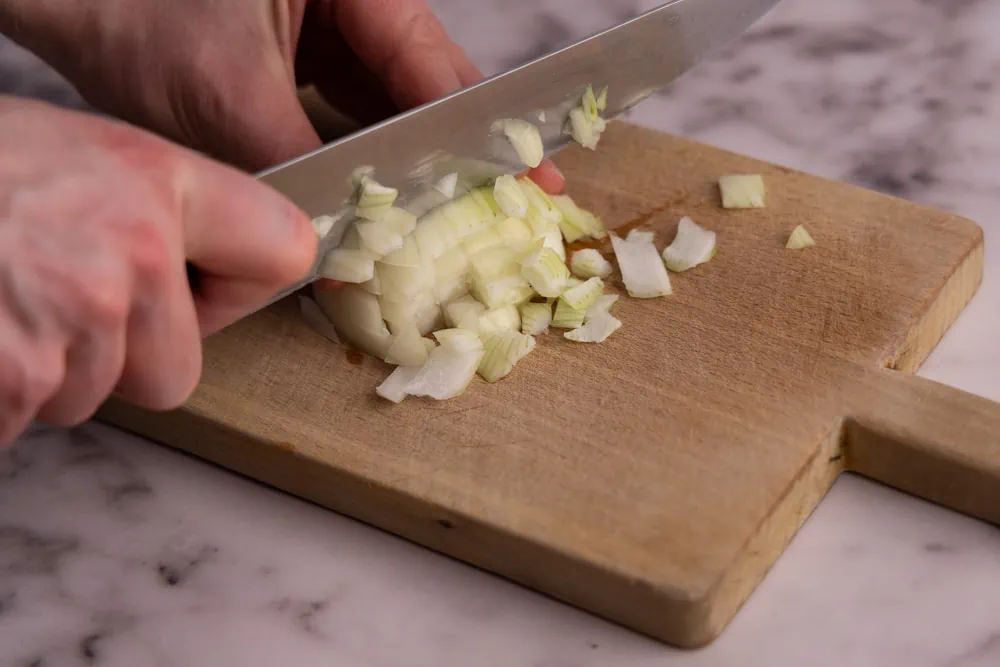
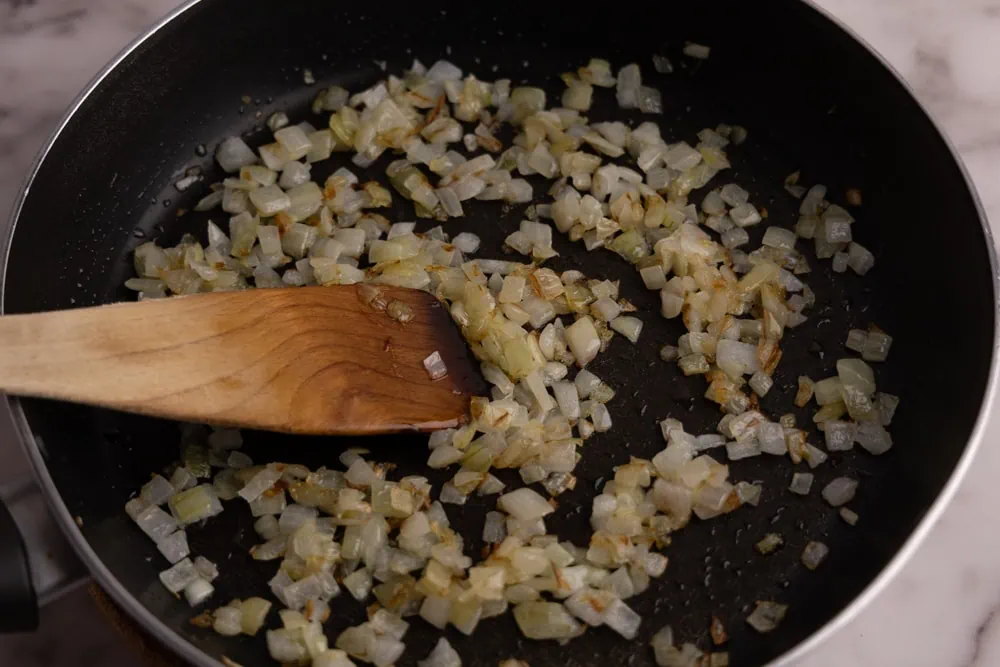
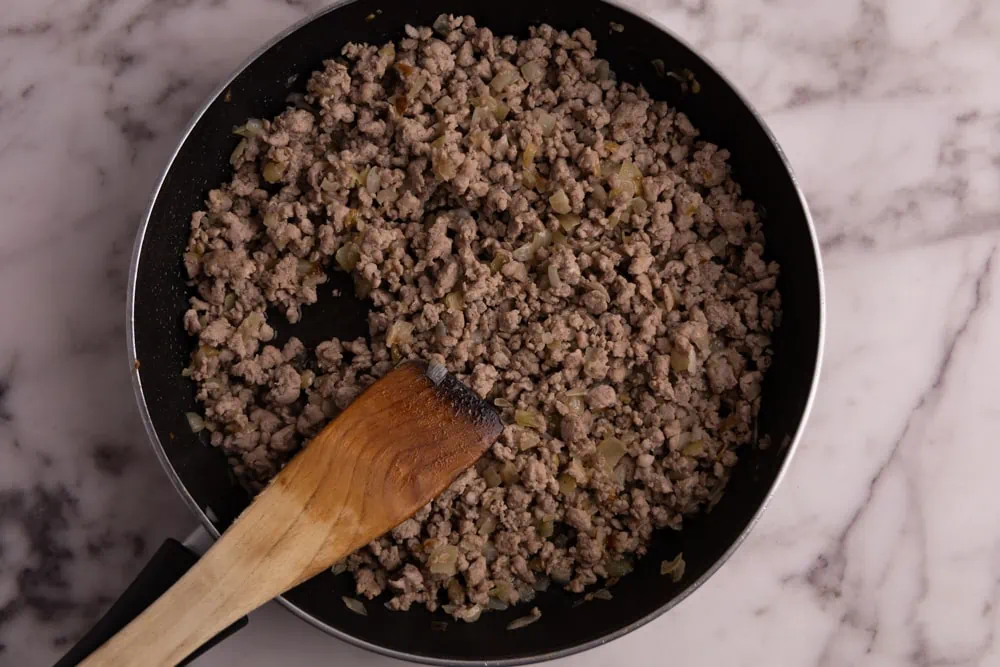
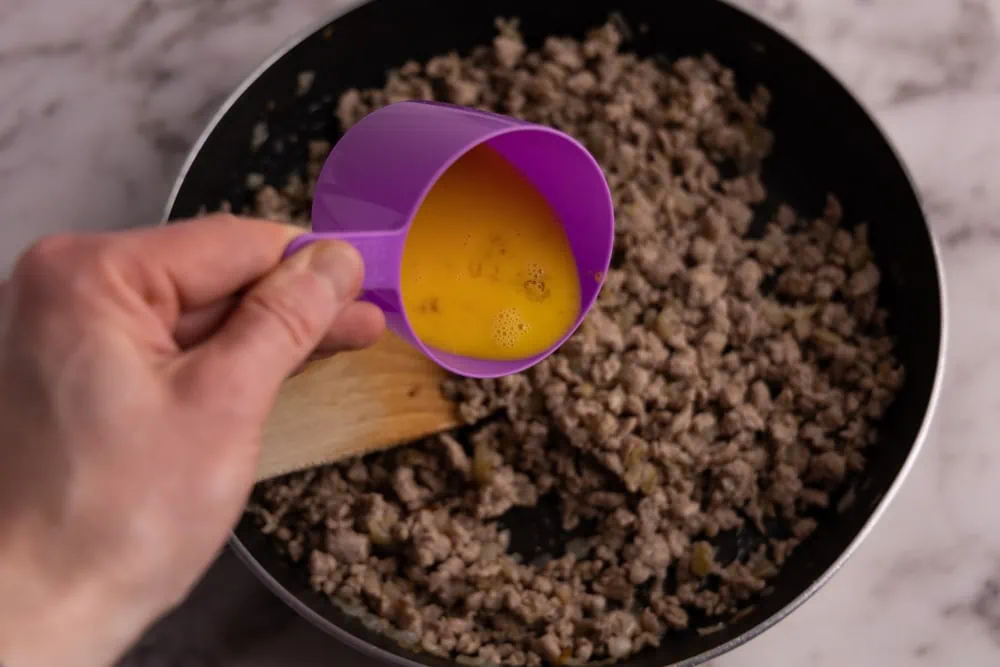
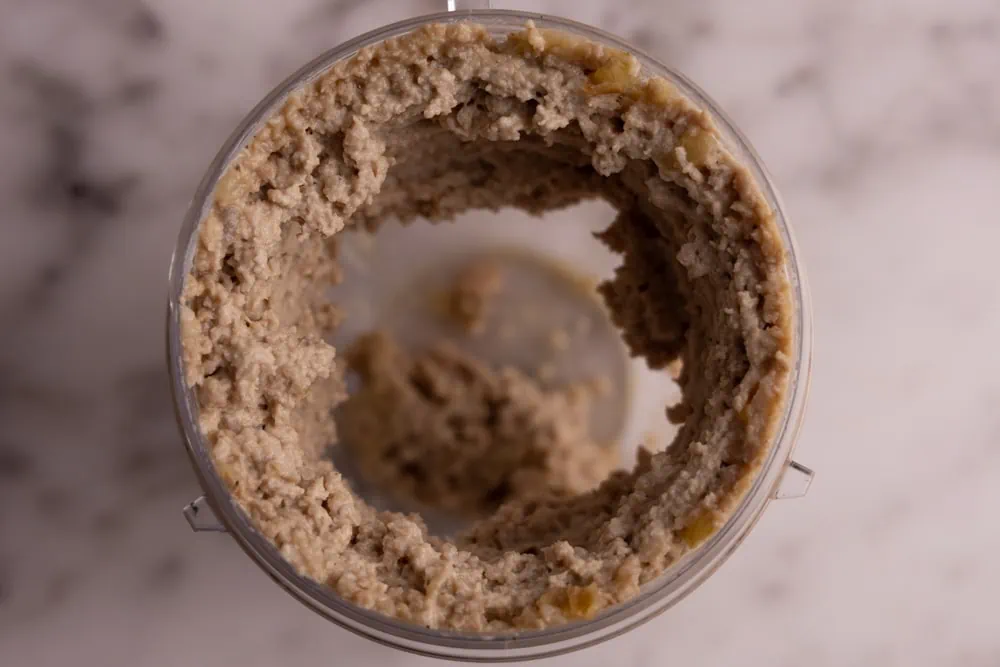
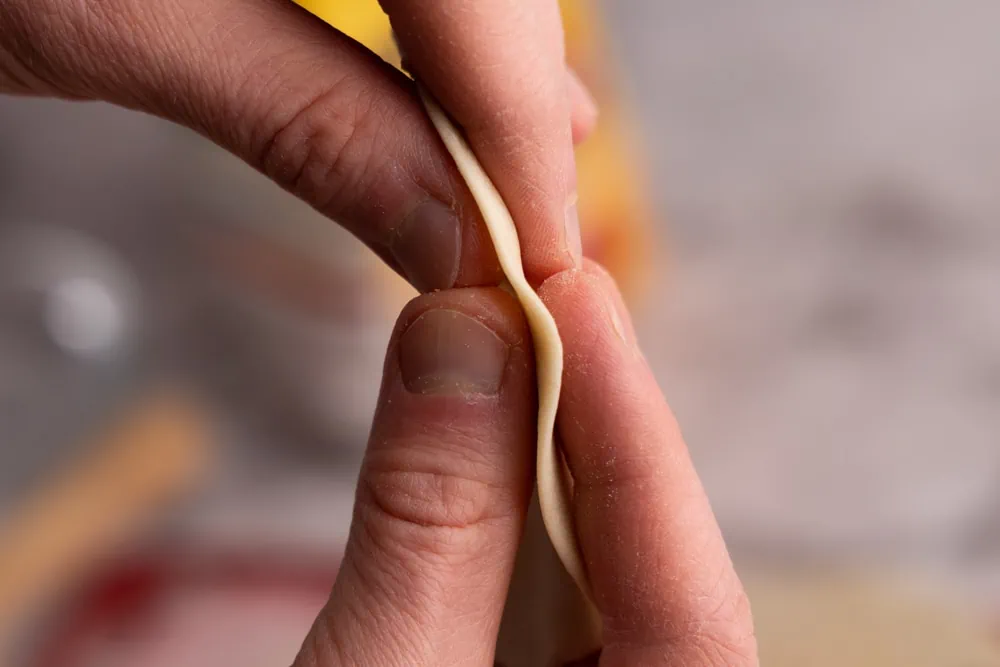
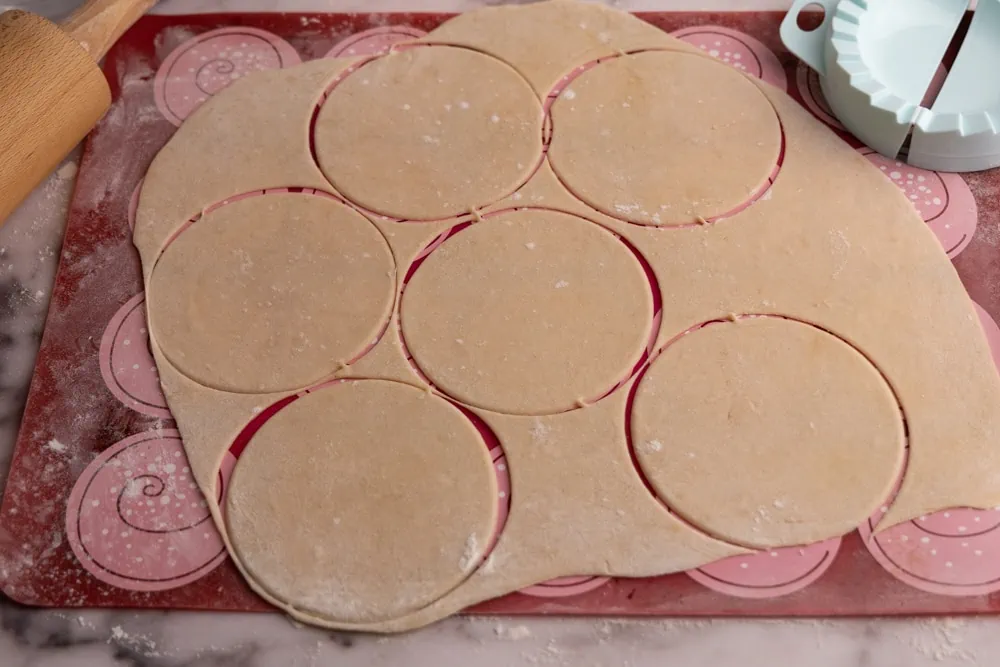
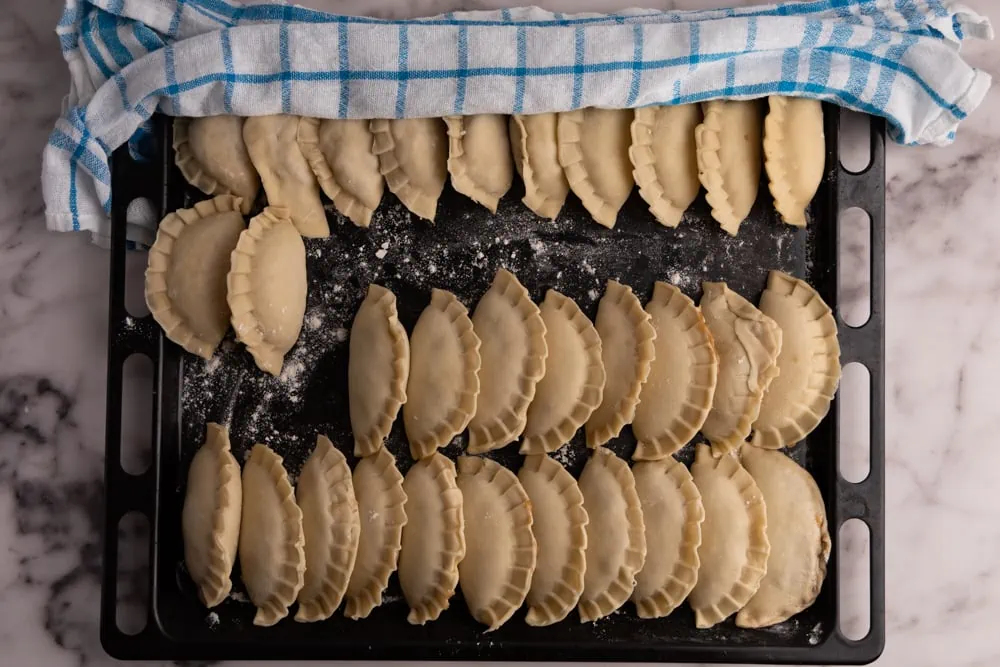
Prepare the pierogi dough using your favorite recipe. Peel and chop an onion, and saute it with a few tablespoons of oil in a non-stick skillet over medium heat for 6 to 10 minutes until soft and cooked. Add the ground meat, salt, pepper, or any other spices that you like. Cook for 10-15 minutes until browned. Taste and adjust seasoning if needed. Let the meat cool down a bit, and then stir in a whisked egg to bind everything together. Grind the meat mixture in a food processor, meat grinder, or blender until it turns into a paste. Divide the pierogi dough into two or three parts. Then, spread one on a floured work surface and roll it out until it’s thin. It shouldn’t be super thin so that you can still stretch it when forming the pockets. Cut palm-sized circles in the rolled pierogi dough using a cookie cutter or glass. Place a spoonful of meat filling in the center of each dough circle. Fold the dough over the filling and press the edges together, starting in the middle. Leave as little air as possible in the pocket you’re forming. To help form a good seal, moisten the outer edge of the dough using a wet finger. Place each formed pierogi on a floured cookie sheet and cover them with a damp kitchen towel. Bring a large pot of salted water to a boil. I typically use one teaspoon of salt per quart of water but feel free to adjust the amount to your preferences. Once the water is boiling, add a few pierogi to the pot and stir them to prevent them from sticking to the bottom. Once the pierogi start floating to the surface, simmer them gently for another 3 to 4 minutes. Make sure not to overcrowd the pot so that the pierogi don’t stick together or cook unevenly. Remove the pierogi from the water using a slotted spoon and serve immediately with your favorite toppings.
Other Variations:
Although traditional Polish meat pierogi are filled with ground pork, you can use any ground meat you like to create your own unique flavor profile. Popular options include beef, turkey, and chicken. That said, keep in mind that different meats require different seasoning. So while a simple combination of salt and pepper may work well for most options, you can experiment with spices like curry powder for ground chicken or a taco seasoning mix for ground beef. The possibilities are endless, and you can create countless variations of meat pierogi by mixing and matching different meats and spices. Just remember to taste the meat after cooking to ensure it’s well-seasoned and suits your taste preferences.
What to Serve With Meat Pierogi:
– Sautéed onions. In diners, or when ordered for takeout, meat pierogi are typically served alone and topped with sautéed onions. Or you can top them with sour cream, for some tang. That said, they can also serve as a meal’s “meat” component.
– Potatoes. Boiled or mashed potatoes are a popular side dish to meat pierogi in Poland. For a variation, you can also make Polish potato dumplings or cook a batch of potato and cheese pierogi.
– A salad. To complement the meat pierogi and potatoes, make a simple salad such as Polish cucumber salad, sauerkraut salad, or shredded carrots and apples.
Recipe Tips:
– Season the meat filling well and taste it before stirring in the egg. Adjust the seasoning as needed to ensure a delicious filling.
– Limit fat. When cooking the onion and ground meat, limit the amount of oil or butter you use to a minimum. You want the meat mixture to be fairly dry, not greasy. The same applies if you’re cooking onions to top your pierogi.
– Consider making a larger batch of pierogi by doubling the dough, and stuffing or using a different pierogi filling (e.g., spinach pierogi, lentil pierogi, asparagus pierogi, or apple pierogi) for the second half of the dough to save time on future meals. Keep in mind that making pierogi is a time-consuming process, so it’s worthwhile to make the most of your effort.
– For an extra burst of flavor and texture, try pan-frying the pierogi after boiling them until they’re lightly browned on both sides.
– Give the pierogi some time to rest, and let the flavors meld. They taste even better the next day, after the flavors have had time to intensify.
– If the filling seems too soft to work with, refrigerate it for at least an hour before using it. This will help it firm up, and make shaping, and filling the pierogi easier. I typically prep the filling the day before I cook the pierogi, and refrigerate it overnight.
– Make sure to have a small bowl of water nearby when forming the pierogi. That water will allow you to quickly moisten the outer edge of the dough, helping it stick better.
– There will be leftover dough, or filling, when making pierogi. That’s the nature of the beast. The amount of dough and filling required depends on various factors, making it difficult to provide exact measurements. If there is a large amount of leftover dough, you can freeze it for later use. But if there’s only enough for a few pierogi, you can discard it. For the leftover filling, I recommend freezing it and using it when making the next batch of pierogi.
– Start boiling the water after you’ve used about half of the filling, and start cooking the pierogi as soon as it boils. Drop a few pierogi into the pot, give them a stir, and continue rolling the dough and forming the pockets, checking how the cooking pierogi are doing every minute or so.


Leave a Reply
You must be logged in to post a comment.